1. Format the microSD card and write a distribution image
Use the utility SD Card Formatter and do a quick format, name the volume: boot

Download Raspbian with desktop (as of May 8, 2019, this is Stretch). Get the "with desktop" version, the "desktop and recommended software" has more apps that may not be needed.
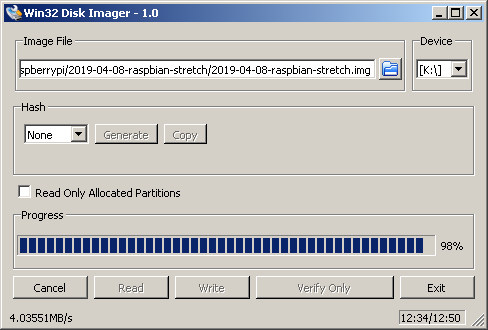
Write the downloaded Raspbian image with Win32 Disk Imager.
2. Add files for SSH and WiFi access
Open Windows Explorer and open the drive containing the microSD card. In this example, it is drive K:

We will be adding two empty text files with the name ssh and wpa_supplicant.conf (note: ssh has NO extension). If your Windows Folder Option is configured to [Hide extensions for known file types], disable/uncheck this option.


The ssh file will remain EMPTY. Use NotePad++ to edit the wpa_supplicant.conf file and add the following:

country=US
update_config=1
ctrl_interface=/var/run/wpa_supplicant GROUP=netdev

network={
scan_ssid=1
ssid="Mimi"
psk="231whitney"
key_mgmt=WPA-PSK
}
- Change the 2-letter country code from US to your location
- Change ssid to your Wifi's SSID
- Change psk to your Wifi's password
- Your router key management is probably be WPA-PSK
Save, exit Notepad++, eject the micoSD device, connect it to the Raspberry Pi Zero W.
4. SSH to the PZW using putty, update, and prep the system
Required for this step is for your PC to be on the same network as the PZW. Use the PuTTY Serial/SSH Client and connect to the PZW:

Enter the IP address (10.10.1.3 this example), and select (●) SSH. Click [Open] to start the SSH session. If the connection is successful, you will prompted with a PuTTY Security Alert, click [Yes] (this is due to the first time connection between the two devices). A command line screen will open and request a log in name:

The default user name is pi and the default password is raspberry

Run the following commands:
sudo apt update
sudo apt upgrade
This will update all your system to the latest version, will take a few minutes. Once completed, we will change 4 configurations:
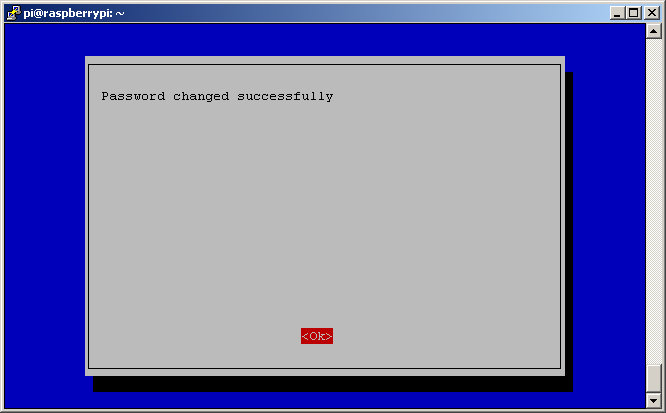
1. Change User Password. This is now the new user password.
5. Interfacing Options -> P3 VNC -> Enabled
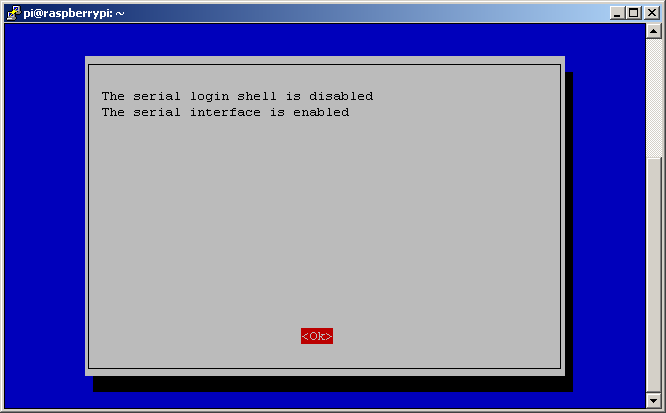
also Interfacing Options -> P6 Serial -> Disable login shell, Enable serial interface.
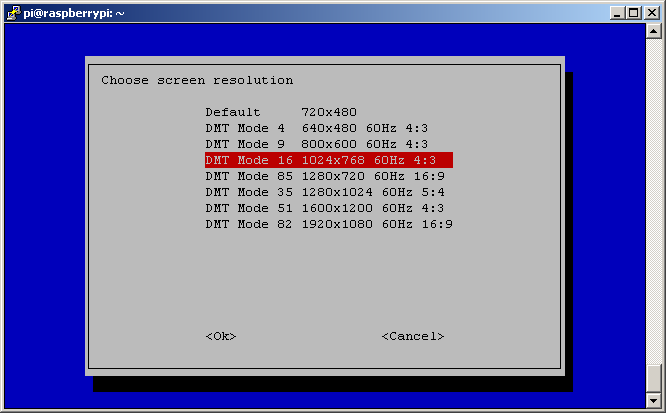
7. Advanced Options -> A5 Resolution -> DMT Mode 16 1024x768 60Hz 4:3
note: 1024x768 is a good place to start, you can try other resolutions later.
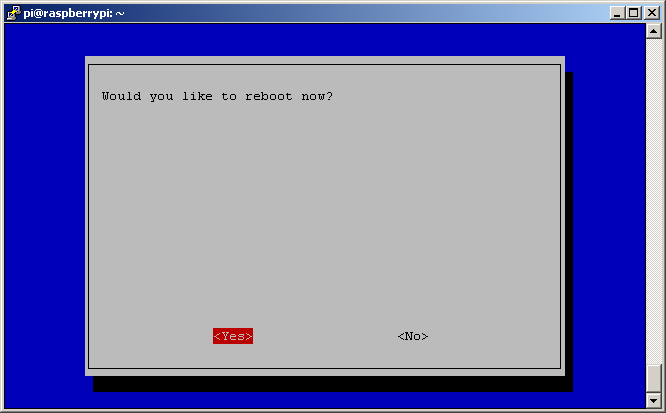
reboot the PZW once completed
run the command:
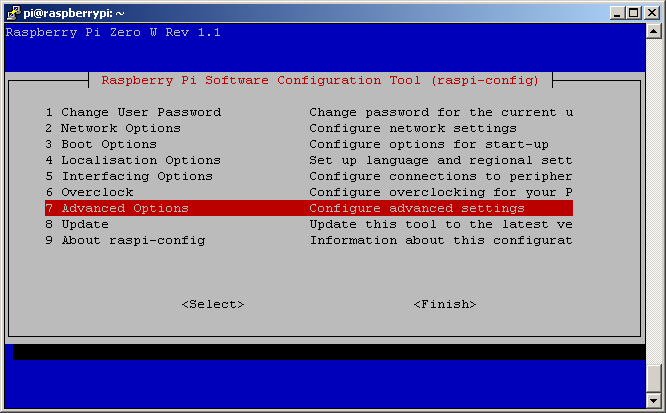
sudo raspi-config


5. Connect to PZW using VNC (PC, Android, iOS)
- For the PC, connecting to the PZW is done with the RealVNC Viewer.
- For Android, go to the Play Store and search for vnc. Select and install VNC Viewer - Remote Desktop from RealVNC Limited.
- For IOS, go to the App Store and search for vnc. Get and install VNC Viewer - Remote Desktop from RealVNC.
For Android or IOS, review control tutorial on first login for various gestures available since a Remote Desktop behavior is different than a native app. Remember, you are dragging a mouse cursor around. Also checkout the online resource from RealVNC.
Launch RealVNC Viewer and use the IP address, username:pi, and password:(new password set earlier). The first login will ask you to set various defaults, go through them with your selection; when in doubt, just choose [Next].

First VNC login (using PC)
You can actually VNC to the PZW using your PC and tablet simultaneously and have the screen of the PZW available on your PC and tablet at the same time.
6. Install and run the serial terminal
If needed, shutdown the PZW (click on the berry at the top left -> Shutdown -> [Shutdown]. After about 15seconds, unplug the power of the PZW and connect the PZW to the F16 or F46 controllers, or connect the G+TX+RX wires of the F13; then power everything back on.
This step will test the Serial port on the PZW using the minicom utility. Either open a terminal on the PZW GUI desktop (via VNC) or run puTTY on your PC and connect to the PZW via SSH (as in step 4 above). Run the following command:
sudo apt install minicom
then run minicom:
sudo minicom -b 921600 -o -D /dev/serial0
This will open the PZW's serial port with a baudrate of 921600.

Press the RESET button on the Controller (on the F13, the RESET is on the STM32F103 module).

If everything is connected properly, the system will respond with some debug messages and the the Grbl version message:
Grbl 1.1f:0.02 ['$' for help]
In this case there are some additional numbers after the 1.1f to designate the GRBL32 firmware version. The $ and press Enter.

GRBL will response with the usual help message. At this point, the PZW is communicating properly with F13/F16/F46.
7. Install and run bCNC, a G Code Sender
The next step is to install bCNC, a G Code Sender application. More information on bCNC is available at the github wiki page (a bit outdated). Each step below can take a while (numpy!).
Open a terminal and run the following commands:
sudo pip2 install --no-cache-dir --upgrade 'Pillow>=4.0'
sudo pip2 install --upgrade 'pyserial<=3.0.1'
sudo pip2 install --upgrade 'numpy>=1.12'
sudo pip2 install --upgrade git+https://github.com/thomast777/bCNC
The first item [Pillow] can take up to 10 minutes. [pyserial] about 1 minute. [numpy] can take more than one hour!. [bCNC] itself will take about 5 minutes. /thomast777/bCNC is my minor mod of bCNC to add the higher baudrate of 921600. If everything installed properly, run bCNC with the following command:
python2 -m bCNC

Change the following items in the Serial section:
Port: /dev/serial0
Baud: 921600
Controller: GRBL1
Click [Open] to connect to the F13/F16/F46 Controller. Note: the above screen shot is on an iPad 3.